About this blog space
This blog space is a place for me to primarily put all my wool gatherings, adventures, experiments. I am now a mum of two astounding daughters, and I used to be a DIY musician and co-ran a tiny independent label (Slampt), so this punk can-do attitude plus feminist analysis and Art school experience somehow informs my wool work! I am also deeply moved by GREEN, trees, weather, colour combinations in nature, and texture. I aim to source wool from round the corner or at the very least UK grown and processed, and to create no toxic waste. This means I get to see sheep as often as I can, sometimes at wool fests.
I am on Ravelry and Etsy as FatHenWildWool and Facebook as Rachel Holborow.
Showing posts with label wool. Show all posts
Sunday, 30 October 2011
Eco dyed batts:spun!
So recently, apart from all my massive work and family responsibilities ( challenging and rewarding, but leaving me little WOOL TIME), I've been spending what time I get developing my fibre eco dyeing and having fun with my NEW Ashford Drumcarder combining the lovely fluffs into delicious, and often "Art" batts. I've been finding it hard to resist spinning the fibre, and mostly haven't managed it, although a little has made it's way into my Etsy shop....
The top yarn here is something I'm going to knit into "Tree of Life" mittens, along with the bottom yarn (when spun). My aim was to make a wintery sky inspired yarn, to back the tree. A friend of mine had given me a non-specific wool fleece, with short bouncy fibres (and a fair few doublecuts...) from her own flock. I'd been gradually dyeing it up, using the woad urine vat method, and docks, nettles, onion skins etc... I took approx 100 grams ( the Tree of Life pattern says you need "2 skeins" of a fingering/sock weight but doesn't specify how much each skein weighs...)of blues, yellows, green-yellows, greys and browns, and combined the bouncy fibres into 2 batts, which faded from blues on one side to yellows on the other, with greys and browns inbetween. The resultant batts were squidgey and bouncy, and mostly lovely to spun, which I did short draw. i say "mostly" because I did have to remove a fair few double cuts along the way, even though I'd been careful to remove any I could prior to carding. Not much of a price to pay for free fleece?(not that I'd generally put such a fleece into my "For Sale" Batts...)
However, the finished yarn is lovely to feel and behold! Bouncy and soft and the colours glow wonderfully together. If only I could knit with it now! (but I will have to wait until I've finished spinning the Black Hebredian first (also full of double cuts;) ))
"Thorn Rose" is the yarn I'm spinning for light relief , which may eventually be used for some socks (which I am currently obsessed with knitting. ALL OTHER PROJECTS ARE ON HOLD whilst the magic of socks grips me.) It's the pink one in the middle and was such a tasty batt to make: All eco dyed wool and silk fibres, all UK grown wool, with some more fun things like recycled sari silk fibres and bamboo fibre added in. It's lovely to draft (I am spinning it in chunks, from the fold, longdraw) silky smooth with texture and colour variation. N.B. that green is from privet....
I happy to find that most of the wool fibre I'm working with is bought, and grown, locally (North of England) some of it Yorkshire, some from just down the road. Hooray!
Some gorgeous fibres that have made their way into the shop (for now....) include curly silky Wensleydale locks and a few 50 gram Art eco batts.
Saturday, 18 June 2011
Ethics and natural dyeing; complexity
Top: Cumbrian Blue Faced Leicester wool locks, cleaned with eco washing powder, by me, then dyed with wild harvested Horseradish, onion skins from the wholefood shop, and madder from?
Bottom: Blue Fcaed Leicester, some commercially processed, some by me, as above, dyed with black beans from? onion skins, goldenrod from UK, and indigo from?
Recently received "Eco Colour" by India Flint in the post: Sustaining soul food for the natural dyer who is trying to pick the most ethical way through to coloured fibres. Afferming and at times eye opening, it's wonderful to come accross a person who makes an ethical approach into an Art via spirit and joi de vivre.
Helped me to focus thoughts feelings actions I've been having about my dyeing works in that I've realised using "findings of the forest floor" is the most comfortable path for me to amble on. Whether I can "give it up" to my results being entirely happenstance remains to be seen.
Methods I question as to being comfortable for myself which India uses: Uses of found metals as mordants/resists: I'm happy with copper (probably beneficial to a body), and possibly iron if dye dregs are thoughtfully treated, but I'm seriously unkeen on Aluminium (surely a link to alzheimer's?):The use of a microwave: I'm never happy with irradiating anything, it's a crime against life itself! Not to mention the high probablity of leaks right into your living space. And then there's Microwave disposal when it's done, it's all too much!
What was really useful was her critiquing of the Logwood and Indigo industries: I guiltily admit to uninformed use of Logwood!(see earlier blog). It is nourishing for me for someone to turn the ethical spotlight onto the natural dye industry, and then prove it's how unnecessary compromised ethics are so eloquently with her wonderful colours. I also love that she questions the use of synthetic dyes so completely: You've probably heard the discussion: Q:Plant dyes are not permenant, so why waste your time using them? A: Some are very long lasting, but ALL dyes fade anyway, as we know from experience (and indeed on my own pootles around Ravelry etc I've certainly noticed complaints of synthethic dyes running, fading and even changing colour!)
Regionalism is also an approach close to my heart: blues from local cabbages just seems so much kinder than indigo from who knows where flown accross the world to my dye pot.
Sometimes, if you talk about the "ethics" of something people will start pointing the finger at you, and try to prove that you are unethical because of some crime once commited. I write this blog post in the spirit of one searching out a path less travelled, who does so because that feels the most sound path to travel. I'm sure there will be many false turnings, and perhaps some unforseen difficulties ahead, but the path of Adventurer in Ethical Colours for Wool I claim as mine to tread! I aim to get better at it one step at a time...
Wednesday, 18 May 2011
Dyeing, dyeing, dyeing
Somehow it always seems wrong to write dyeing, the "e" really feels like it shouldn't be in there. But hey, the vaguaries of the English language....
Anyway. Done alot of dyeing. All onto Blue faced Leicester. All with natural dyes using mordants such as vinegar, lemons, alum: From top base of golden rod overdyed with lac and madder. Nettles, black beans and onions. Lac, onions and cutch. Onions, beans, golden rod. Beans with alum. Cabbage and onions and dandelions. Will write more about some of these sometime soon.........
Saturday, 5 March 2011
Grass and docks as dye plus Secret santa yarn
This top fibre is a recent experiment in plant dye colours. As always I am on the search for ways to obtain greens. I don't know exactly why I'm so obsessed with that colour, but perhaps it has to do with chakra colours! The green chakra relates to the chest/ heart area, and as I understand it the area of the body concerned with being open hearted and love. But maybe green just makes me happy!
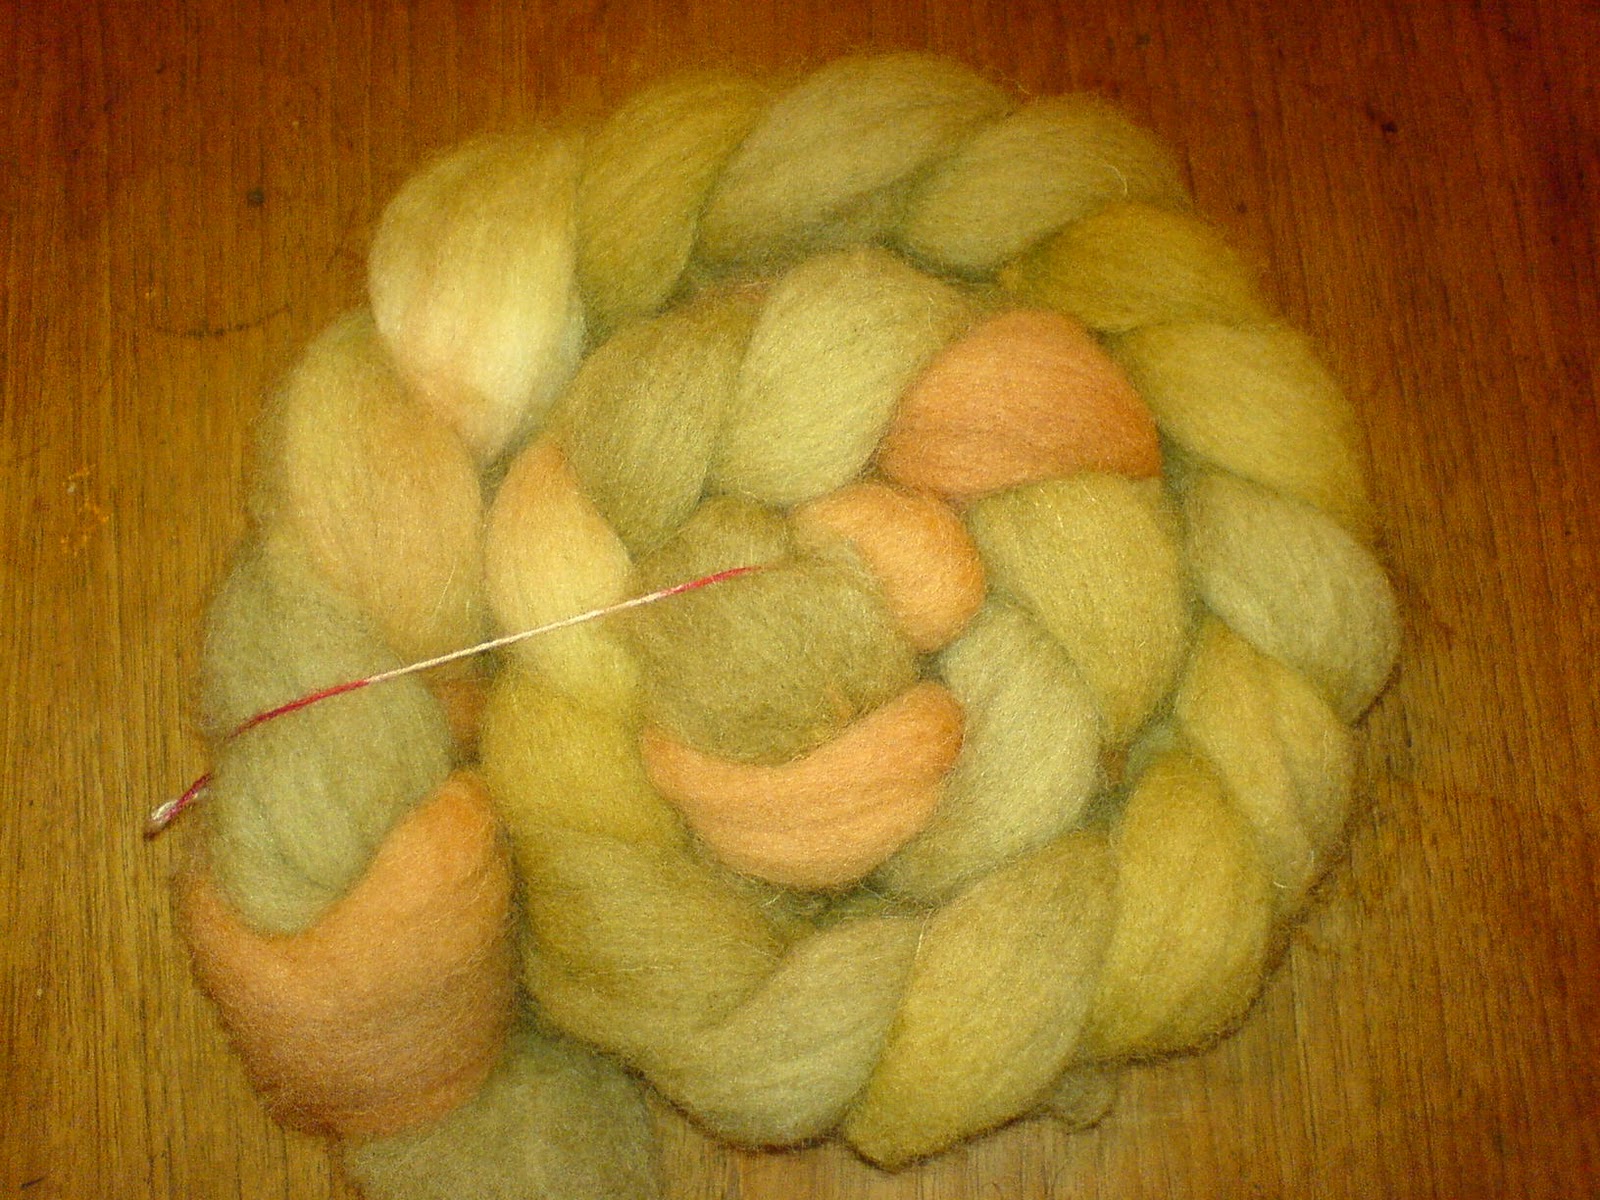
Anyway, so to get the greenish yellow in the photo, I used dock roots, freshly dug from the allotment in a hope of having fewer docks scattering their seeds over my veg patch this year. These I cut up quite small and let steep in rain water for a few days. Then I remembered about them, and simmered the pot for about 40 mins on the stove. Then later that day I re-simmered them. Then I let them rest over night, and re-simmered them. Then, when the mixture had cooled, I strained out the veg matter, and mud, and inserted the wetted wool (Texel in this case for sox spinning) I heated the wool in the mixture 2 times in a similar fashion to extracting the colour from the dock roots.I added the juice of 2 lemons before heating. I let the wool rest in the dyepot over night. The crucial thing is to get as much colour as poss out of the docks, then to get as much as poss into the wool, without felting it. This takes as long as it takes, and letting the wool rest in the mixture is very much part of it!
Extracting and dyeing with the liquid from the grass was a very similar process to the dock roots, but the heated up grass REALLY STANK the HOUSE out! I don't know WHAT is in grass to make it so smelly when cooked but it honestly smelled of carnivore excrement. Yuck! My husband and the kids were NOT impressed. However, Fay was very keen on having the finished fibre when it was all dry and fluffy and not smelly.... In the photo the colours look more vibrant than they do in cloudy daylight, as they were taken on our table at night under artificial light.
The other photo is WHAT I SPUN from the secret santa fibre I received from the UKSpinners on the Ravelry forum.(see a previous post). It was blended with various reds and silky noils and throwsters waste etc. None of the baby batts were more than 50% red. I'm currently really interested in how green combines with other colours, but especially reds. There is an exciting section with cocoons spun on, which I loved doing! It's a soft, slightly overspun, singles of 16 WPI (fingering weight). And I am currently intending to knit it into a cowl in the round. I am hoping that it's slightly overspun quality might make the stockingette twist a little, but I don't know if that happens after you've set the twist?
Labels:
blending,
docks,
drum carder,
Grass,
plant dyeing,
singles,
spinning,
wool
Sunday, 9 January 2011
Wool in every room
I fell asleep last night with the comforting thought that there was wool in every room of the house! Here are the photos and I'll explain...
1 Top: Bath of wool
2 Middle: Shelf of wool
3 Bottom: Bobbin of wool
The most comforting of all, is that some of a Texel fleece (this one from Woolfest), is currently cleaning in the bath overnight. I aim to do it over night, and through most of the next day, so as to cause the minimum of disruption to my family. It will soak overnight in hot water with some washing soda, and then in the morning a hot rinse, and then another later on. Then by bathtime i need to have moved the fleece up to the loft to start drying , as it's winter, flat on a sheet.
I love to be washing a fleece, as it means lots more to spin. The only hassle is when you're having to do it in a hurry. I also love the fact that I know exactly where this fleece is from, and that only gentle cleaning products have been used on it, and that no electricity has been used to produce something spinnable.
And somehow, the whole process gives me a secret smile of satisfaction...
Photos 2 and 3 are both from the living room, and show last night's spinning from my own hand blended hand plant dyed batts, and "the wool basket", which has all sorts in, currently a dry felted Mother Earth who needs fixing, my Christmas present from the family (a niddy noddy), my current spindle spinning of hand blended batts in a red/brown/purple colourway of merino, silk, waste nylon glitz, blue faced leicester and other random bits, plenty of handspun, some hand dyed, hand blended singles, and some a My Heart Exposed fibre artist dyed two ply, also various knitting needles, a bag of knitting (currently a bootie), and small left over balls of yarn, which i constantly use to tie things up.
Both photos 2 and 3 have yarns in process which are very slender for me, as I am hoping to get something usable for knitting a lacey shawlette.
So that's the bathroom and the living room. The kitchen has some red and green two ply, handspun by Fay my 8 year old daughter, drying after having been set. Mine and Marc's bedroom has a basket and two boxes of unpun wool, mostly tops. One of the boxes holds my Etsy shop contents, mostly plant dyed tops at the moment. I happy to say that I've needed to do a slight restock recently as people have been buying it for spinning and dry felting. Hooray!
The loft has fleeces needing washing or carding in it, and my precious stash of yarn. The girl's room has Fay's stash of yarn, and her tops for spinning, and what she's spun too! Which makes a houseful of wool.
(ofcourse there's always my knitting and Fay's crochet projects, which travel around the house too....)
Monday, 3 January 2011
Logwood dyeing
Strangely, all of the above fibres are dyed with logwood. As is often the case with plant dyes, if you process them differently, you get different effects. Logwood (usually bought as a powder or chippings from dye suppliers) I have found, produces colours ranging from red to magenta to purple to brown.
Red was obtained by solar dyeing the fibres (cotswold wool) in a large Kilner jar, using rain water. The chippings of logwood were put in the bottom of the jar on our East facing window sill in the hieght of sunny summer for a week, unmordanted wool and water were added.A bold red resulted!
This red wool when immersed for 30 mins in water with washing soda added turned magenta, excitingly!
A deep purple was obtained from (hard) tap water with Alum dissolved in it, soaking the logwood chips in it over night and then slowly heating it to simmer twice. The chips were strained off. The dye liquor was allowed to cool, then wool was added and heated up to simmer twice, slowly. I left it in overnight, and a vibrant purple resulted.
The same logwood chips were allowed to soak overnight with tap water and Vinegar ( a whole bottle!), and in a similar process to before, I obtained a deep brown.
The logwood in the photos above has made the purple, brown and pinky red.
Aparentally it can also make blue. And I find it is a reasonably priced dyestuff too.
Saturday, 4 December 2010
Finishing felt piece and Handspun 3 ply socks!
One advantage to this snow is being house bound, which ofcourse means lots of woolwork oportunities! So I've finally been able to finish off my felt commision. It worked out OK in the end, but I was worried when I'd finished wet felting the basic piece and it was just erm VERY ABSTRACT, which wasn't what I was aiming for. Luckily the power of a dry felting needle helped me to resolve some areas and give it a little more definition. Hooray for the versatility of wool!
My other triumphant finishing moment was this morning with these socks. Wonderful warm cosy woolly socks for Me! made from my very own hand plant dyed, handspun three ply wool yarns. The toes and heels are deliberately more hard wearing, ie slightly thicker and plied very tightly! I've had problems in the past with having to continually darn 100% wool socks, so I shall see, and possibly update you, as to how well these wear. The wools used are2 plys of texel and one of blue faced leicester. The heels and toes "Tweedy Yarn" is a very random selection of gathered from barbed wire wool, odd bits of merino, silk, kempy wools, slightly felted in dyeing experiments etc. The plant dyed colours are from onion skins(bronze), elderberries (green), exhausted damsons (pink), elder + tumeric (mossy green).
I hadn't really gone for it with 3 plying before, but I really enjoyed the mixing of the colours and the round springiness of the yarns. A 3 ply really did make my ribs "pop" in a way a 2 ply or singles wouldn't've (is that a word?).
My other triumphant finishing moment was this morning with these socks. Wonderful warm cosy woolly socks for Me! made from my very own hand plant dyed, handspun three ply wool yarns. The toes and heels are deliberately more hard wearing, ie slightly thicker and plied very tightly! I've had problems in the past with having to continually darn 100% wool socks, so I shall see, and possibly update you, as to how well these wear. The wools used are2 plys of texel and one of blue faced leicester. The heels and toes "Tweedy Yarn" is a very random selection of gathered from barbed wire wool, odd bits of merino, silk, kempy wools, slightly felted in dyeing experiments etc. The plant dyed colours are from onion skins(bronze), elderberries (green), exhausted damsons (pink), elder + tumeric (mossy green).
I hadn't really gone for it with 3 plying before, but I really enjoyed the mixing of the colours and the round springiness of the yarns. A 3 ply really did make my ribs "pop" in a way a 2 ply or singles wouldn't've (is that a word?).
Labels:
3 ply,
felt,
plant dyes,
rib.,
socks,
woodland scene,
wool
Sunday, 28 November 2010
Blue from Cabbage
As dyestuffs become less easy to obtain from weeds in winter, I roam in search of dye from the grocer's shelf. I have recently stumbled accross this ad hoc method for obtaining a blue or sometimes slate blue/grey from red (purple) cabbages:
First get, by whatever means you are comfortable, one to two red cabbages.
Next chop them up until you have enough to fill your Dyepot (Stainless steel is best, as some metals ie iron, aluminium and copper can change your dye colour..). Add enough water to cover cabbage ( rain water is best), then simmer for at least an hour. Strain the cabbage dregs out and put on the compost heap.
The water will be an outrageously gorgeous shade of purple, but that means nothing in the world of plant dyeing. At this point add some (half a bottle?) of vinegar to help the dye bite into the wool.
Let this dyepot sit and cool.
Thoroughly wet your wool to be dyed. But do not agitate it. Be gentle and caressing.
When your dye pot is no more than luke warm you can immerse your wool in it and then slowly (to prevent felting) bring it up to simmering. Simmer for at least 20 mins. Then you can take it off the heat. I like to leave my wool in the pot of dye a least overnight, to ensure a reasonable colour.
Then you can rinse out the dye, and you should have a sort of sky to slate blue. I found with Blue Faced Leicester white tops, I got blue, but The Texel white I dyed at the same time in the same pot came out greyer. Ah, the curious world of plant dyeing....
The photo at the top of this blog entry features BFL dyed with red cabbage, tumeric, exhausted logwood, and onion skins (kindly saved and donated by my local real health food shop Alligator, Thanks).
First get, by whatever means you are comfortable, one to two red cabbages.
Next chop them up until you have enough to fill your Dyepot (Stainless steel is best, as some metals ie iron, aluminium and copper can change your dye colour..). Add enough water to cover cabbage ( rain water is best), then simmer for at least an hour. Strain the cabbage dregs out and put on the compost heap.
The water will be an outrageously gorgeous shade of purple, but that means nothing in the world of plant dyeing. At this point add some (half a bottle?) of vinegar to help the dye bite into the wool.
Let this dyepot sit and cool.
Thoroughly wet your wool to be dyed. But do not agitate it. Be gentle and caressing.
When your dye pot is no more than luke warm you can immerse your wool in it and then slowly (to prevent felting) bring it up to simmering. Simmer for at least 20 mins. Then you can take it off the heat. I like to leave my wool in the pot of dye a least overnight, to ensure a reasonable colour.
Then you can rinse out the dye, and you should have a sort of sky to slate blue. I found with Blue Faced Leicester white tops, I got blue, but The Texel white I dyed at the same time in the same pot came out greyer. Ah, the curious world of plant dyeing....
The photo at the top of this blog entry features BFL dyed with red cabbage, tumeric, exhausted logwood, and onion skins (kindly saved and donated by my local real health food shop Alligator, Thanks).
Wednesday, 3 November 2010
Damsons as dye
I unexpectedly had a lot of damsons on my hands.... what could I do when I realised that they'd gone mouldy waiting for me to make them into jam? Simmer them up in some rain water with some vinegar (chip shop sort), strain the mush off, and dye some wool with them, ofcourse... The above Texel fibre is dyed with Damsons (the rusty bits), and elderberries, and ofcourse urine.
I love this one, and will spin it when it's time expires on Etsy if another fibre enthusiast doesn't get there first...
This fibre, Autumn Glow, also has damson in it, as well as elderberries and docks and madder... And although I'm not a "yellow" person, I find the combo quite suave. None of this dyeing process was exceptionally smelly, although the damsons did start to get a bit musty before they'd been simmered up. All the waste is composting nicely though... I used Texel wool for both of these two fibres. I love it actually! I am really starting to feel that whilst Merino has a place as a fibre, the bounce and texture of many other wools, are often way more thrilling to me!
I love this one, and will spin it when it's time expires on Etsy if another fibre enthusiast doesn't get there first...
This fibre, Autumn Glow, also has damson in it, as well as elderberries and docks and madder... And although I'm not a "yellow" person, I find the combo quite suave. None of this dyeing process was exceptionally smelly, although the damsons did start to get a bit musty before they'd been simmered up. All the waste is composting nicely though... I used Texel wool for both of these two fibres. I love it actually! I am really starting to feel that whilst Merino has a place as a fibre, the bounce and texture of many other wools, are often way more thrilling to me!
Labels:
Damsons,
docks,
elderberries,
madder,
plant dyed,
wool
Navajo Ply, first attempt!
This is my first ever attempt at Navajo Plying!
Using my birthday money I splashed out and bought some handpainted wool tops (mostly in green of course). This one is from Wheeldale Woolcrafts, and very reasonably priced...
For my birthday I'd also got some books about spinning "Get Spun" by S North, and "Spin Control" by Amy Singer, the first a more"Art" (as opposed to the "primitive" or "punk" yarns I produced in the beginning..)Yarn how to, the second, an in depth analysis and explaination of all the building blocks of skill, and their reasons for being in the spinning pantheon. These ofcourse have been inspiring me to develop my spinning repertoire, and causing many wide awake small hours brain meanderings of spinning creativity, as I plot my next yarns... Some ofcourse just happen as they go along...
However, more to the point, the above yarn occured because I could actually UNDERSTAND Amy Singer's directions for Navajo Plying. This, I think, is because she likens it to chain stitch in crocheting, and really in essence that's all it is, a series of both edges of the loops pulled through each other (in a chain), fairly large, and plied together with the strand you are holding, ofcourse the thing I hadn't previously realised was that Navajo Ply is a 3 ply, NOT a 2 ply! Well it's one Singles Plied on itself into a 3 Ply. Anyway....
It worked out okay, except that it's a little hard to keep the tension on all 3 strands even and sometimes mine crossed over. But when I did my (normal) 3ply sock wool (plant dyed greens, BFL and Cheviot, and natural Texel) I found that a little easier, see? Just above...
Using my birthday money I splashed out and bought some handpainted wool tops (mostly in green of course). This one is from Wheeldale Woolcrafts, and very reasonably priced...
For my birthday I'd also got some books about spinning "Get Spun" by S North, and "Spin Control" by Amy Singer, the first a more"Art" (as opposed to the "primitive" or "punk" yarns I produced in the beginning..)Yarn how to, the second, an in depth analysis and explaination of all the building blocks of skill, and their reasons for being in the spinning pantheon. These ofcourse have been inspiring me to develop my spinning repertoire, and causing many wide awake small hours brain meanderings of spinning creativity, as I plot my next yarns... Some ofcourse just happen as they go along...
However, more to the point, the above yarn occured because I could actually UNDERSTAND Amy Singer's directions for Navajo Plying. This, I think, is because she likens it to chain stitch in crocheting, and really in essence that's all it is, a series of both edges of the loops pulled through each other (in a chain), fairly large, and plied together with the strand you are holding, ofcourse the thing I hadn't previously realised was that Navajo Ply is a 3 ply, NOT a 2 ply! Well it's one Singles Plied on itself into a 3 Ply. Anyway....
It worked out okay, except that it's a little hard to keep the tension on all 3 strands even and sometimes mine crossed over. But when I did my (normal) 3ply sock wool (plant dyed greens, BFL and Cheviot, and natural Texel) I found that a little easier, see? Just above...
Labels:
3 ply,
Blue Faced Leicester,
chain,
Cheviot,
green,
Navajo,
plant dyed,
ply,
plying,
Texel,
wool
Saturday, 2 October 2010
Adventures in Green
So as green is my FAVOURITE COLOUR to an extent I really can't explain, I am going to share what I have so far discovered about dyeing wool green with plant dyes and WITHOUT use of copper sulphate, as it just seems too toxic. I'm an asthmatic and I hate to poison the environment, so harsh mordants don't seem the best way to go for me. I also am not happy to use Acid dyes, primarily because to my knowledge they are derived from petrochemicals, and as we purposefully don't even own a car for this reason, it doesn't sit comfortably with me. I'm sure there's plenty of info out there on the petro chemical industry, so I'm not going into it here.
Anyway, GREEN!
My favourite shade of green is a mossy green, not conifer, not Granny Smiths Apple, not quite grassy green. This I have discovered on my travels with plant dyes is hard to obtain. As I don't use copper sulphate, I have a complicated route to green, which involves over dyeing, and as many as three pots. My current favourite is:
Tumeric / Elderberries / Urine
If you first prepare your wool, carded or unprepared, but definitely with no lanolin left in, as it acts as a resist to dyes, by immersing in luke warm, then slightly warmer water. Try to get any air bubbles out gently as they can also act at a resist. Just be gentle in general with the wool, do everything slowly and change temperatures slightly, to prevent felting as much as possible. A silky wool in a Top like Blue Faced Leicester is highly likely to trap air.
I then make a Tumeric dye bath in a big stainless steel pan, which is EASY. For approx 100g of wool, as little as 25g Tumeric will get a very strong Yellow. (although sometimes, when it's old?, tumeric gives an orange)( I also hear that Tumeric fades with time, which may or may not be true) This may be too strong for you if you want a grassy green/conifer green, in which case use less Tumeric, or take the wool out quickly, after a couple of minutes. Heat the pan with water and Tumeric in for only a few minutes on a simmer (There should be enough water to cover wool well when added, and I use rainwater, harvested from a water butt, off the flat roof, as it should be soft water). You want the water to be less than a boil or the wool will felt, but a bit warmer than would be comfortable for your hand, as then it will set to the wool. You can also add some lemon juice for some extra mordanting, and acid yellowness. You only need to leave it in for 10 mins or so as Tumeric is so strong, or you can leave it in until water has cooled to help the wool adjust and not felt. You will find that the Tumeric does not really dissolve but is more suspended in the water, so if you want an even colour you will have to move the wool around gently to get all over coverage. I'm not bothered about that, as one reason I dye for myself is to get interesting varigated colours for interesting spinning and knitting of yarns.
Okay so, then, take the wool out of the tumeric, and wash gently at a similar temperature to the dye pot it was in, to minimise the chance of felting. You are aiming to get as much yellow and pwder out a s you can at this stage. As Tumeric is kind of greasy, a bit of Bio D washing powder or washing up lioqid at this stage helps, but you need to wash the bubbles out too, with as little squeezing as poss.
Phew! Then have a cup of tea and let the wool rest, whilst you wait for your Elderberries dyepot to heat up!
For your elderberry dyepot first pick a carrier bag full of Elderberries then add them plus a 70fl bottle of vinegar (4 Cups?) to some soft water (enough to cover berries) and heat up. DO NOT BOIL as you are aiming for a pinky purple NOT a grey, which will result in boiling water. Simmer for approx 1 Hr, or until alot of the colour has gone out of the berries. The water should be a rich pinky purple. Whilst the water is still hot immerse the wool, which should be of a similar temperature by having been rested in water baths of gradually increasing warmth. This is the bit that irritates me, so if I'm dyeing for myself I rush it and end up with slightly felted wool, which needs more pre drafting for spinning... Then leave the wool in the dye bath for as long as your patience allows, but definitely 8hrs. It should be a kind of pinky gold/tannish colour.
Then rinse the wool, you can use cool water as the dyepot is now cooled.
Then add it to a bucket that your husband hates full of GONE OFF URINE solution. To make gone off Urine collect the family's wee for a few days then put a lid on it for at least 2 weeks. My Husband refused to donate his wee... It doesn't need to be a full bucket load at all. This gone off urine has Ammonia in it, a strong Alkali. When you immerse pink/ red shades in alkalis they go green! I guess this is because plant derived reds are acidic, especially if they've had vinegar added. It doesn't work with madder though.
The bucket has a very smelly liquid in it after 2 weeks, and you can add some water to it too, before you add your wool, to make enough solution for your wool to sit very comfortably. An hour should be long enough to turn it magically GREEN.
You will want to wash out the disgusting wee smell anyway, but don't forget to do it gently in cold water. This method has given me variety of greens, from yellowy green to conifer green, including the elusive mossy green when I'm lucky. You can get a greyish green by ommiting the dyeing yellow stage. You can dye with weld, nettles, dock leaves, horse radish etc for the yellow stage, with an alum mordant if you wish, but the effects will be more subtle. I also have got excellent greens, from mossy to sea green by combining indigo dyed wool with yellows, mordanted as appropriate. It seems to work best with indigo as the first dye, then the yellow, when the wool has dried out.
I have slight reservations about using Tumeric as it does seem to fade over the years. I also don't like using the spectralite chemical as an oxygen reducing agent in the indigo process. But I guess I need to do the full 'woad brewing process' then...
All above photos use elderberries, tumeric and urine to get different effects. Nothing is guaranteed in the world of plant dyes, excitingly....
Anyway, GREEN!
My favourite shade of green is a mossy green, not conifer, not Granny Smiths Apple, not quite grassy green. This I have discovered on my travels with plant dyes is hard to obtain. As I don't use copper sulphate, I have a complicated route to green, which involves over dyeing, and as many as three pots. My current favourite is:
Tumeric / Elderberries / Urine
If you first prepare your wool, carded or unprepared, but definitely with no lanolin left in, as it acts as a resist to dyes, by immersing in luke warm, then slightly warmer water. Try to get any air bubbles out gently as they can also act at a resist. Just be gentle in general with the wool, do everything slowly and change temperatures slightly, to prevent felting as much as possible. A silky wool in a Top like Blue Faced Leicester is highly likely to trap air.
I then make a Tumeric dye bath in a big stainless steel pan, which is EASY. For approx 100g of wool, as little as 25g Tumeric will get a very strong Yellow. (although sometimes, when it's old?, tumeric gives an orange)( I also hear that Tumeric fades with time, which may or may not be true) This may be too strong for you if you want a grassy green/conifer green, in which case use less Tumeric, or take the wool out quickly, after a couple of minutes. Heat the pan with water and Tumeric in for only a few minutes on a simmer (There should be enough water to cover wool well when added, and I use rainwater, harvested from a water butt, off the flat roof, as it should be soft water). You want the water to be less than a boil or the wool will felt, but a bit warmer than would be comfortable for your hand, as then it will set to the wool. You can also add some lemon juice for some extra mordanting, and acid yellowness. You only need to leave it in for 10 mins or so as Tumeric is so strong, or you can leave it in until water has cooled to help the wool adjust and not felt. You will find that the Tumeric does not really dissolve but is more suspended in the water, so if you want an even colour you will have to move the wool around gently to get all over coverage. I'm not bothered about that, as one reason I dye for myself is to get interesting varigated colours for interesting spinning and knitting of yarns.
Okay so, then, take the wool out of the tumeric, and wash gently at a similar temperature to the dye pot it was in, to minimise the chance of felting. You are aiming to get as much yellow and pwder out a s you can at this stage. As Tumeric is kind of greasy, a bit of Bio D washing powder or washing up lioqid at this stage helps, but you need to wash the bubbles out too, with as little squeezing as poss.
Phew! Then have a cup of tea and let the wool rest, whilst you wait for your Elderberries dyepot to heat up!
For your elderberry dyepot first pick a carrier bag full of Elderberries then add them plus a 70fl bottle of vinegar (4 Cups?) to some soft water (enough to cover berries) and heat up. DO NOT BOIL as you are aiming for a pinky purple NOT a grey, which will result in boiling water. Simmer for approx 1 Hr, or until alot of the colour has gone out of the berries. The water should be a rich pinky purple. Whilst the water is still hot immerse the wool, which should be of a similar temperature by having been rested in water baths of gradually increasing warmth. This is the bit that irritates me, so if I'm dyeing for myself I rush it and end up with slightly felted wool, which needs more pre drafting for spinning... Then leave the wool in the dye bath for as long as your patience allows, but definitely 8hrs. It should be a kind of pinky gold/tannish colour.
Then rinse the wool, you can use cool water as the dyepot is now cooled.
Then add it to a bucket that your husband hates full of GONE OFF URINE solution. To make gone off Urine collect the family's wee for a few days then put a lid on it for at least 2 weeks. My Husband refused to donate his wee... It doesn't need to be a full bucket load at all. This gone off urine has Ammonia in it, a strong Alkali. When you immerse pink/ red shades in alkalis they go green! I guess this is because plant derived reds are acidic, especially if they've had vinegar added. It doesn't work with madder though.
The bucket has a very smelly liquid in it after 2 weeks, and you can add some water to it too, before you add your wool, to make enough solution for your wool to sit very comfortably. An hour should be long enough to turn it magically GREEN.
You will want to wash out the disgusting wee smell anyway, but don't forget to do it gently in cold water. This method has given me variety of greens, from yellowy green to conifer green, including the elusive mossy green when I'm lucky. You can get a greyish green by ommiting the dyeing yellow stage. You can dye with weld, nettles, dock leaves, horse radish etc for the yellow stage, with an alum mordant if you wish, but the effects will be more subtle. I also have got excellent greens, from mossy to sea green by combining indigo dyed wool with yellows, mordanted as appropriate. It seems to work best with indigo as the first dye, then the yellow, when the wool has dried out.
I have slight reservations about using Tumeric as it does seem to fade over the years. I also don't like using the spectralite chemical as an oxygen reducing agent in the indigo process. But I guess I need to do the full 'woad brewing process' then...
All above photos use elderberries, tumeric and urine to get different effects. Nothing is guaranteed in the world of plant dyes, excitingly....
Labels:
blue,
elderberries,
green,
plant dyeing,
tumeric,
urine,
wool,
yellow
Subscribe to:
Posts (Atom)